302-864-4014
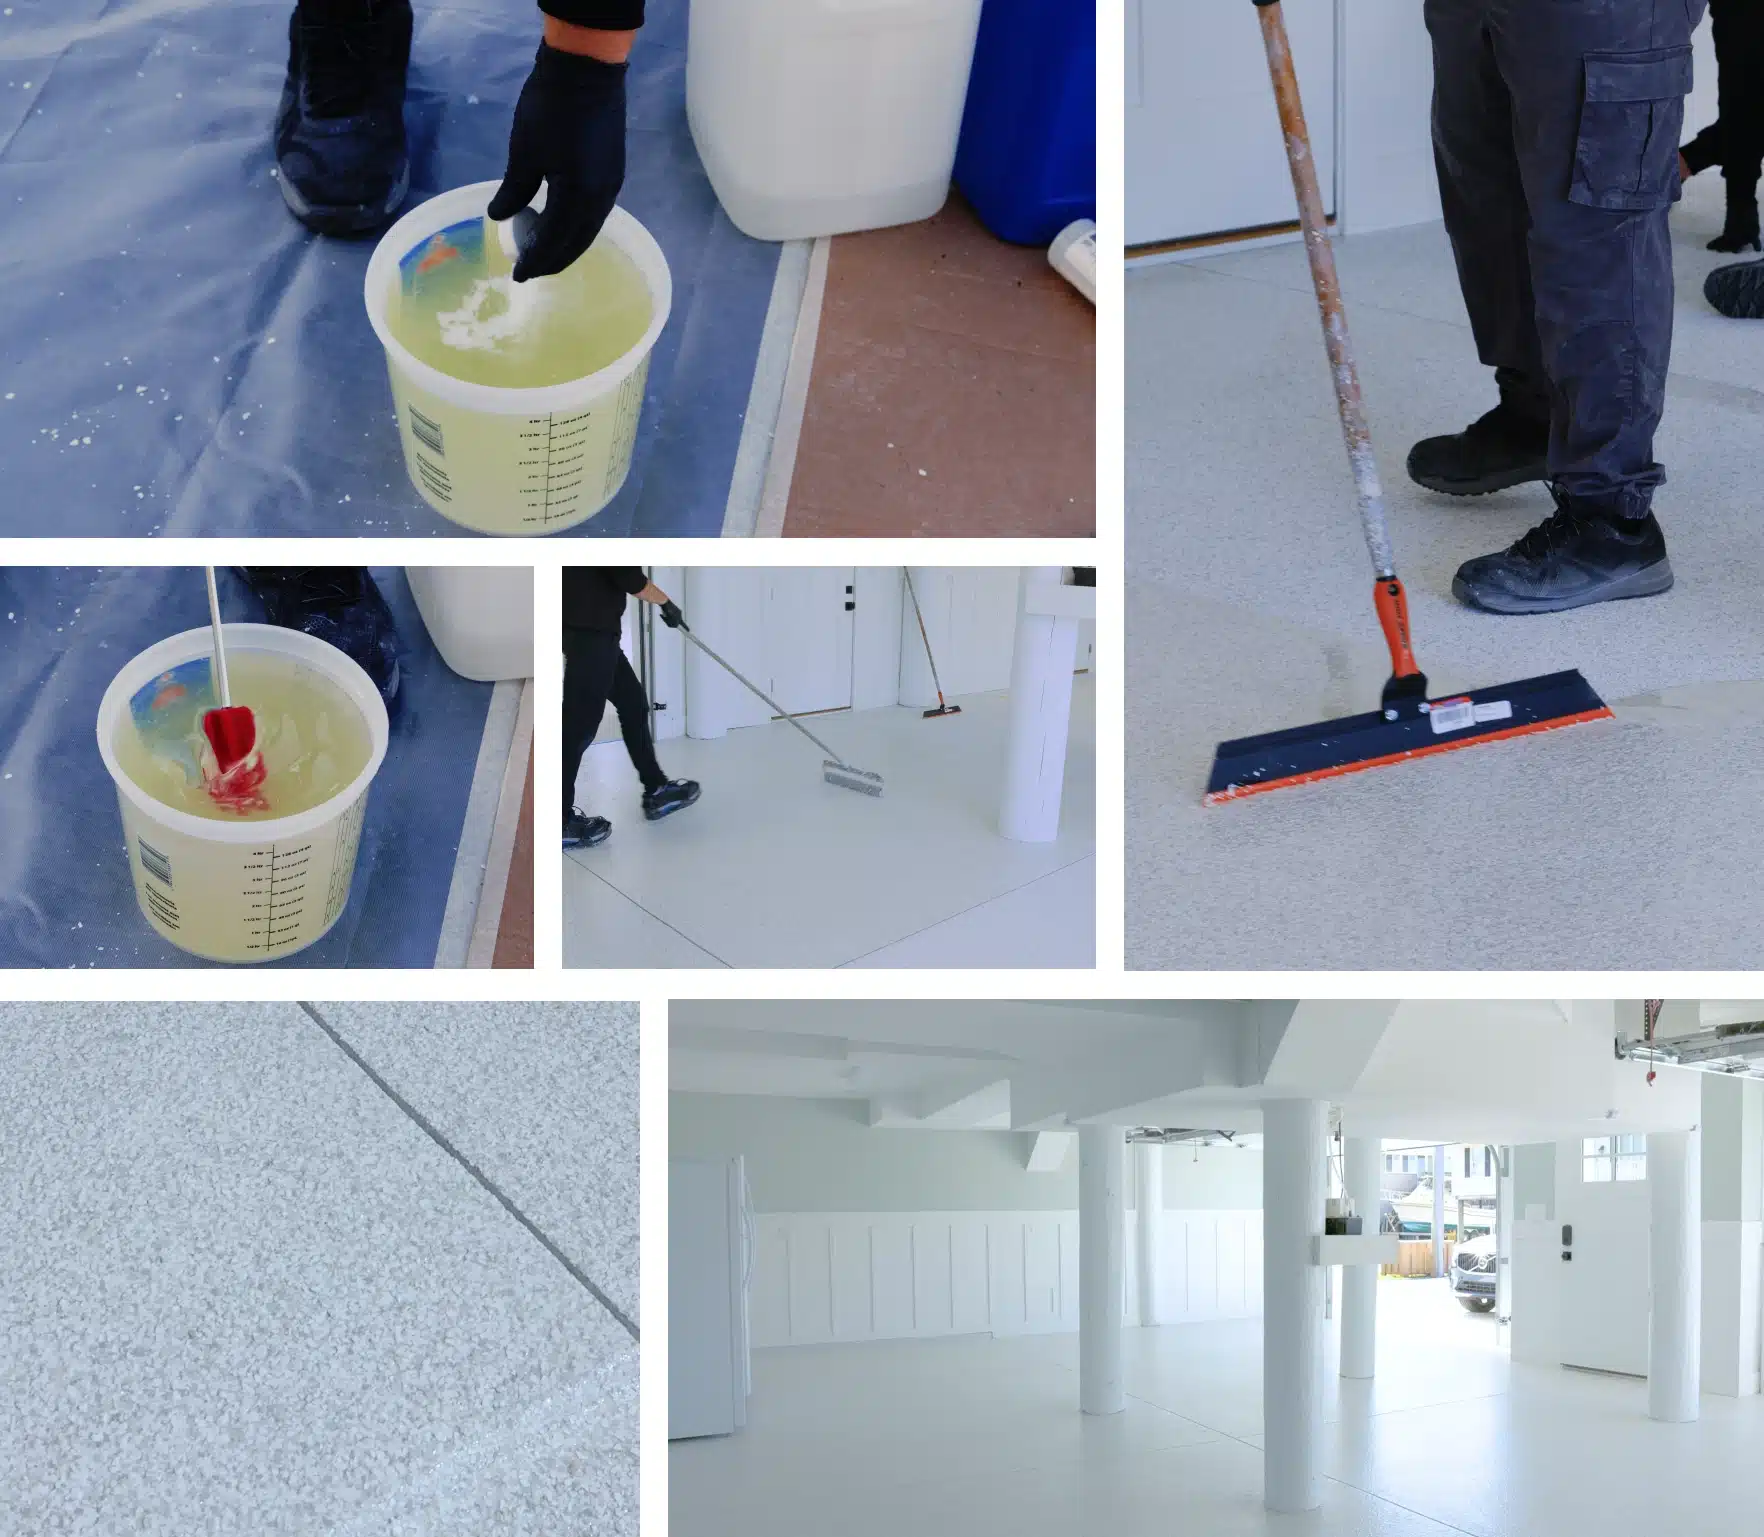
5-STEP FLOOR COATING APPLICATION PROCESS

Schedule Your Free Design Consultation
LET'S TALK ABOUT YOUR FLOORING REMODEL PROJECT.
REQUEST A FREE CONSULTATION
Our teams can complete your flooring project in as little as one day.
Each morning, our crews arrive on-site at approximately 8:30 a.m. After greeting the customer, we review the application process and answer any questions. Our trucks are outfitted as mobile workshops with equipment and materials to tackle any challenges.
This is the Delaware Concrete Coatings 5-step application process.
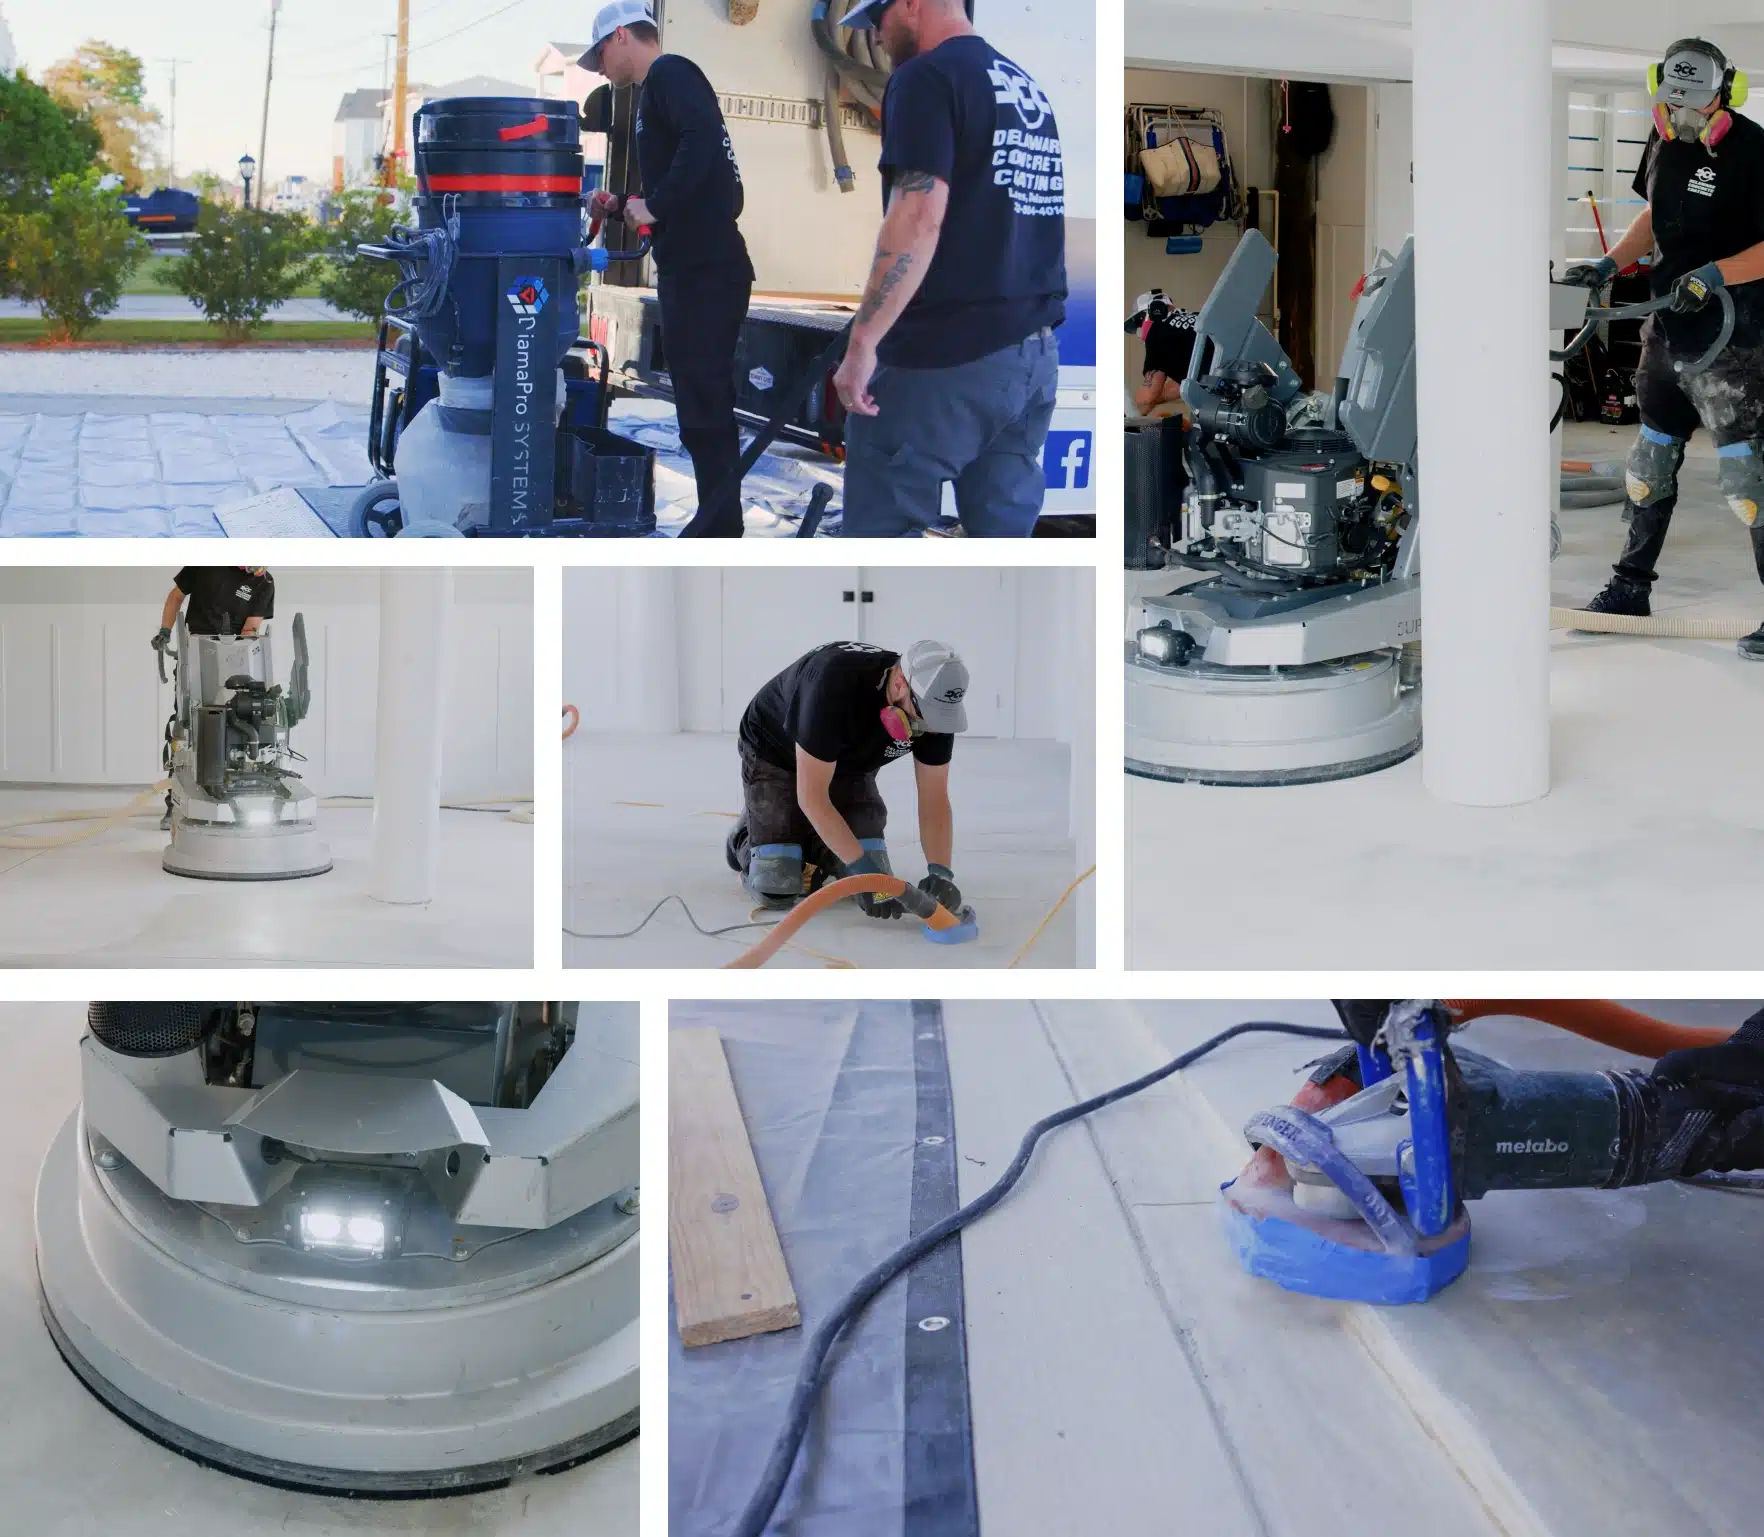
STEP 1 – SURFACE PREPARATION
The foundation of a long-lasting floor coating begins with thorough surface preparation.
This step involves cleaning the concrete floor to remove dirt, oil, and other contaminants. We use industrial-grade equipment to grind the surface, creating a smooth profile that ensures optimal adhesion of the coating.
This process also includes repairing any cracks or damages to the concrete, setting the stage for a flawless application.
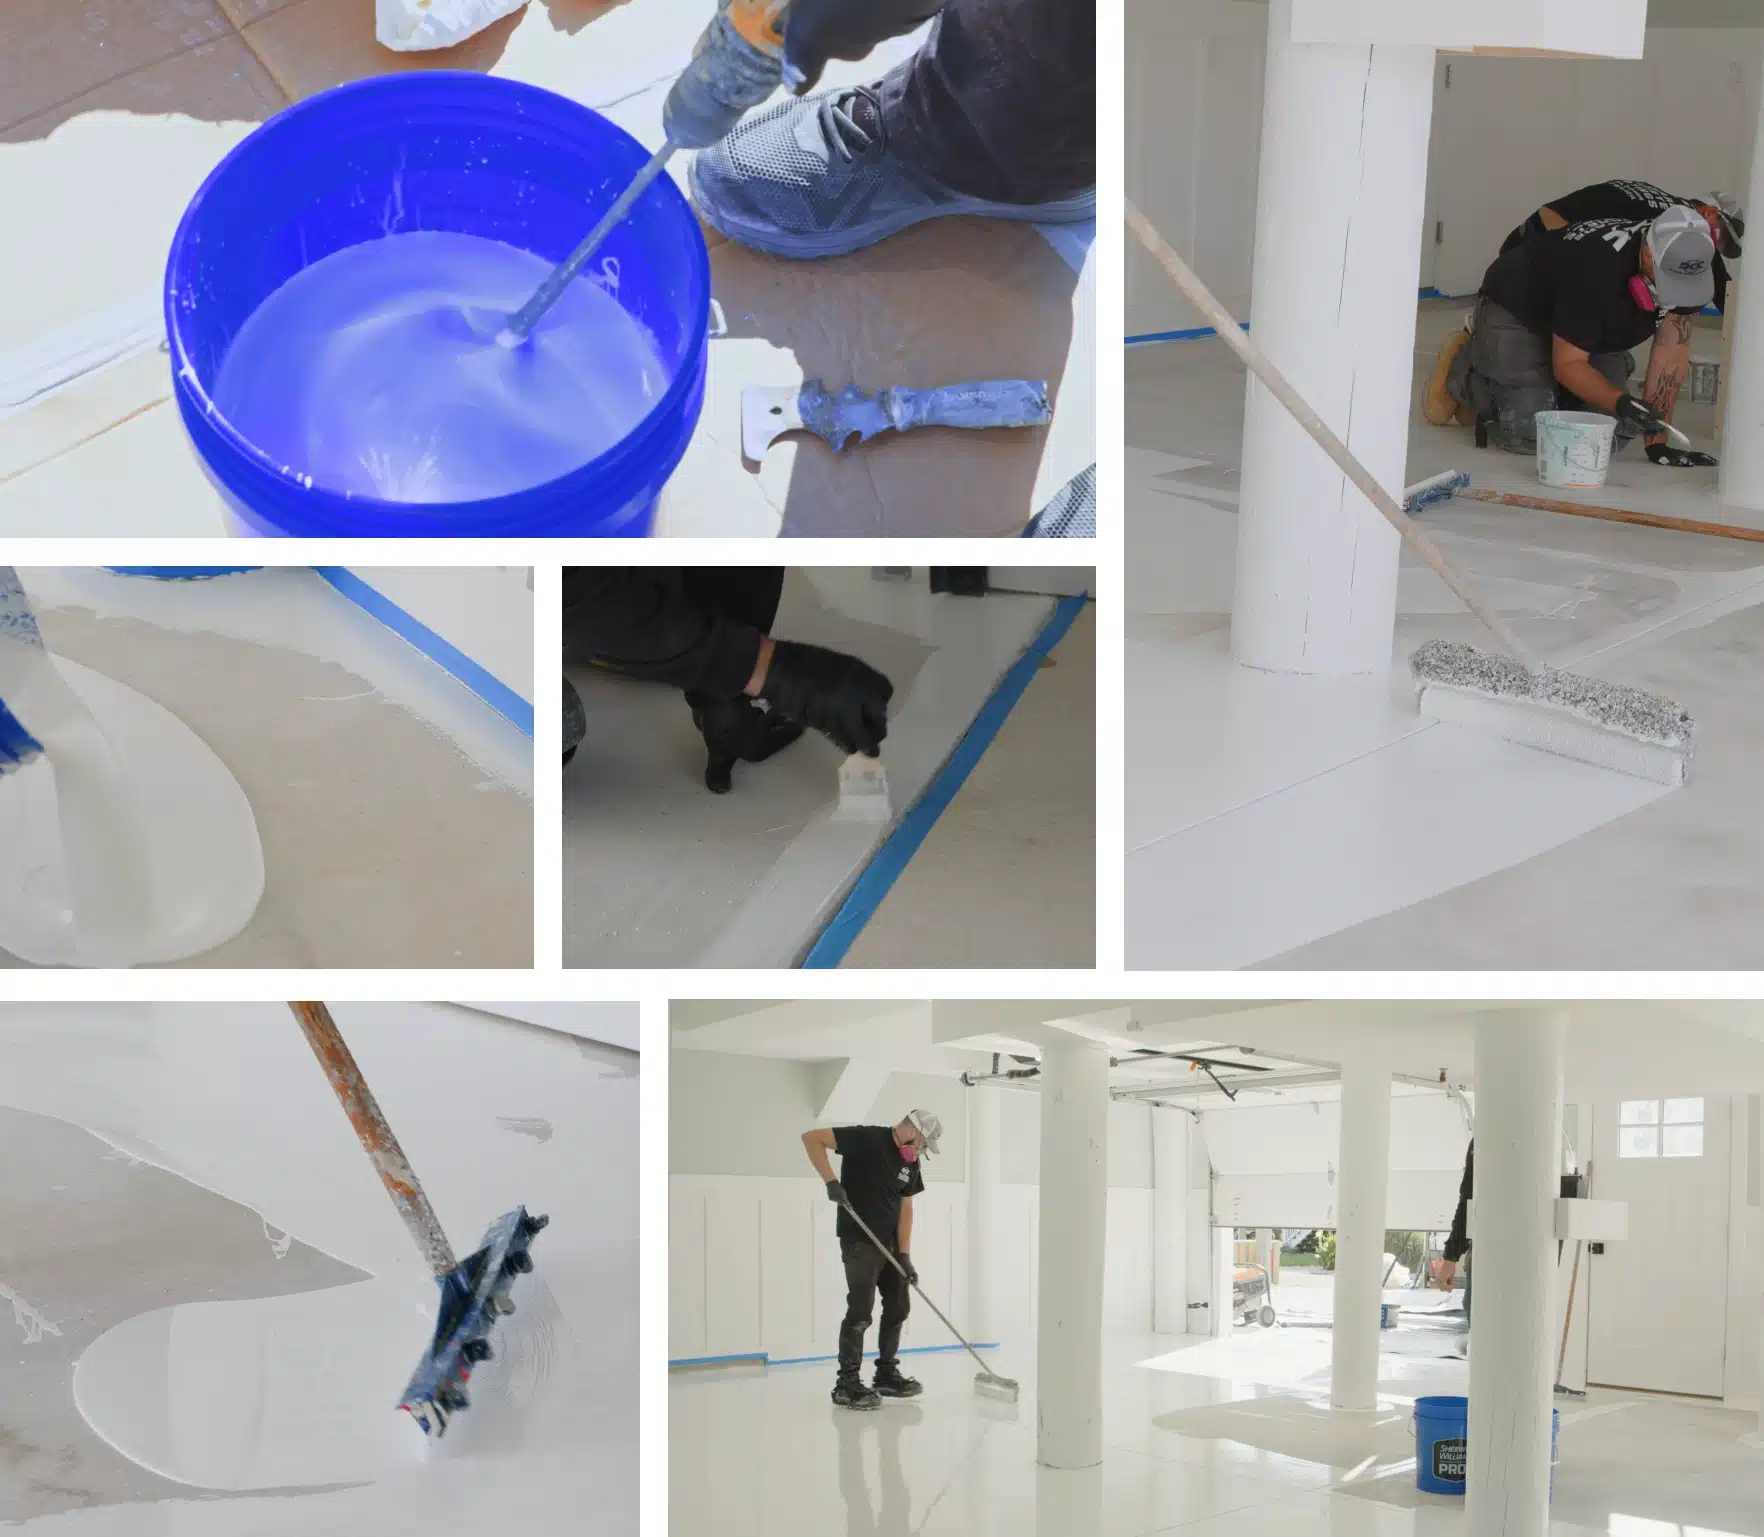
STEP 2 – BASE COAT APPLICATION
Following the preparation, a base coat is meticulously applied to the concrete.
This layer serves as the primary bond between the concrete and the decorative elements or topcoat. Our high-quality epoxy or polyurea base coats are selected for their durability and resilience, providing a strong, impermeable foundation that resists wear and tear.
The base coat is carefully spread to ensure even coverage, forming the first layer of defense against the elements.
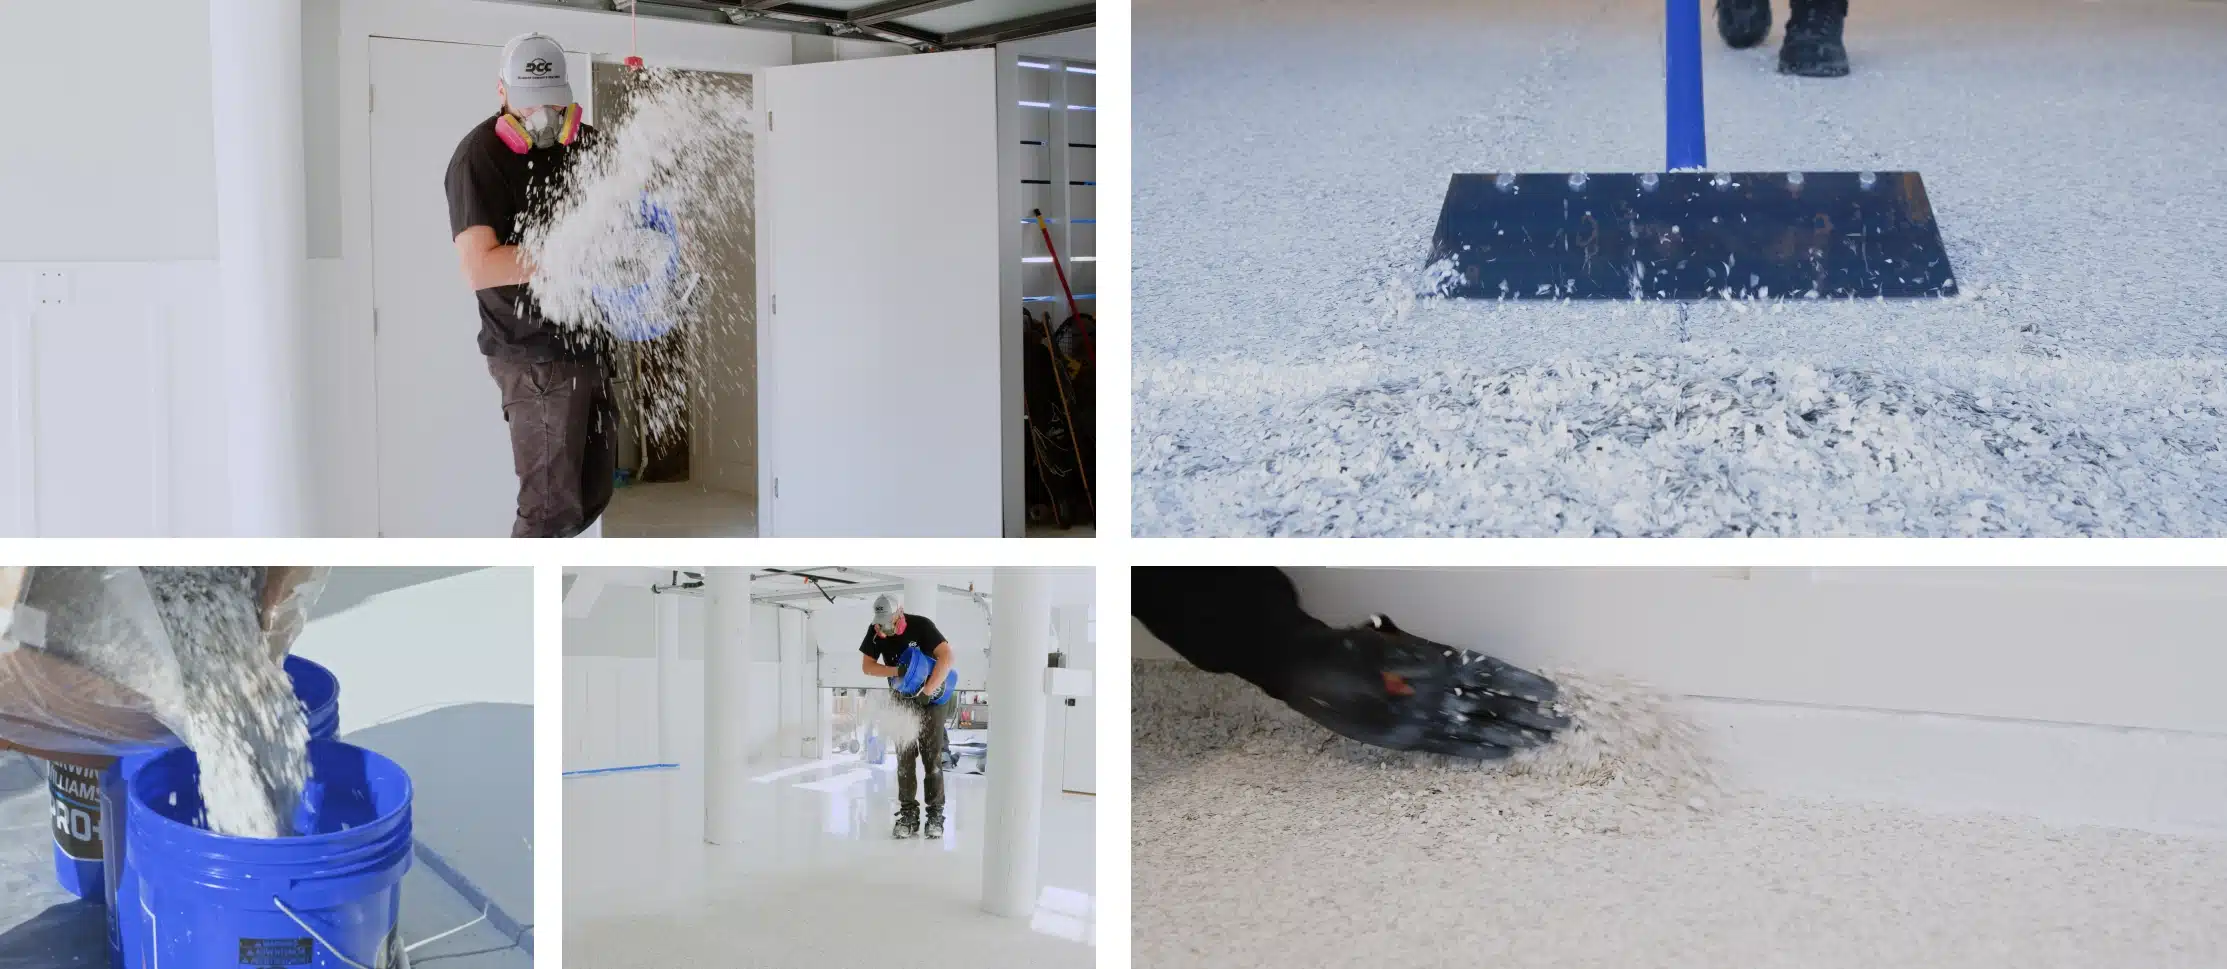
STEP 3 – DECORATIVE FLAKES
Once the base coat is in place, decorative chips are broadcasted across the surface to add color, texture, and slip resistance.
This step is customizable, with a variety of colors and sizes available to match your desired aesthetic. The chips not only enhance the appearance but also contribute to the floor's durability by adding an extra layer of protection. They are generously applied to ensure full coverage and are embedded into the base coat while it's still wet.
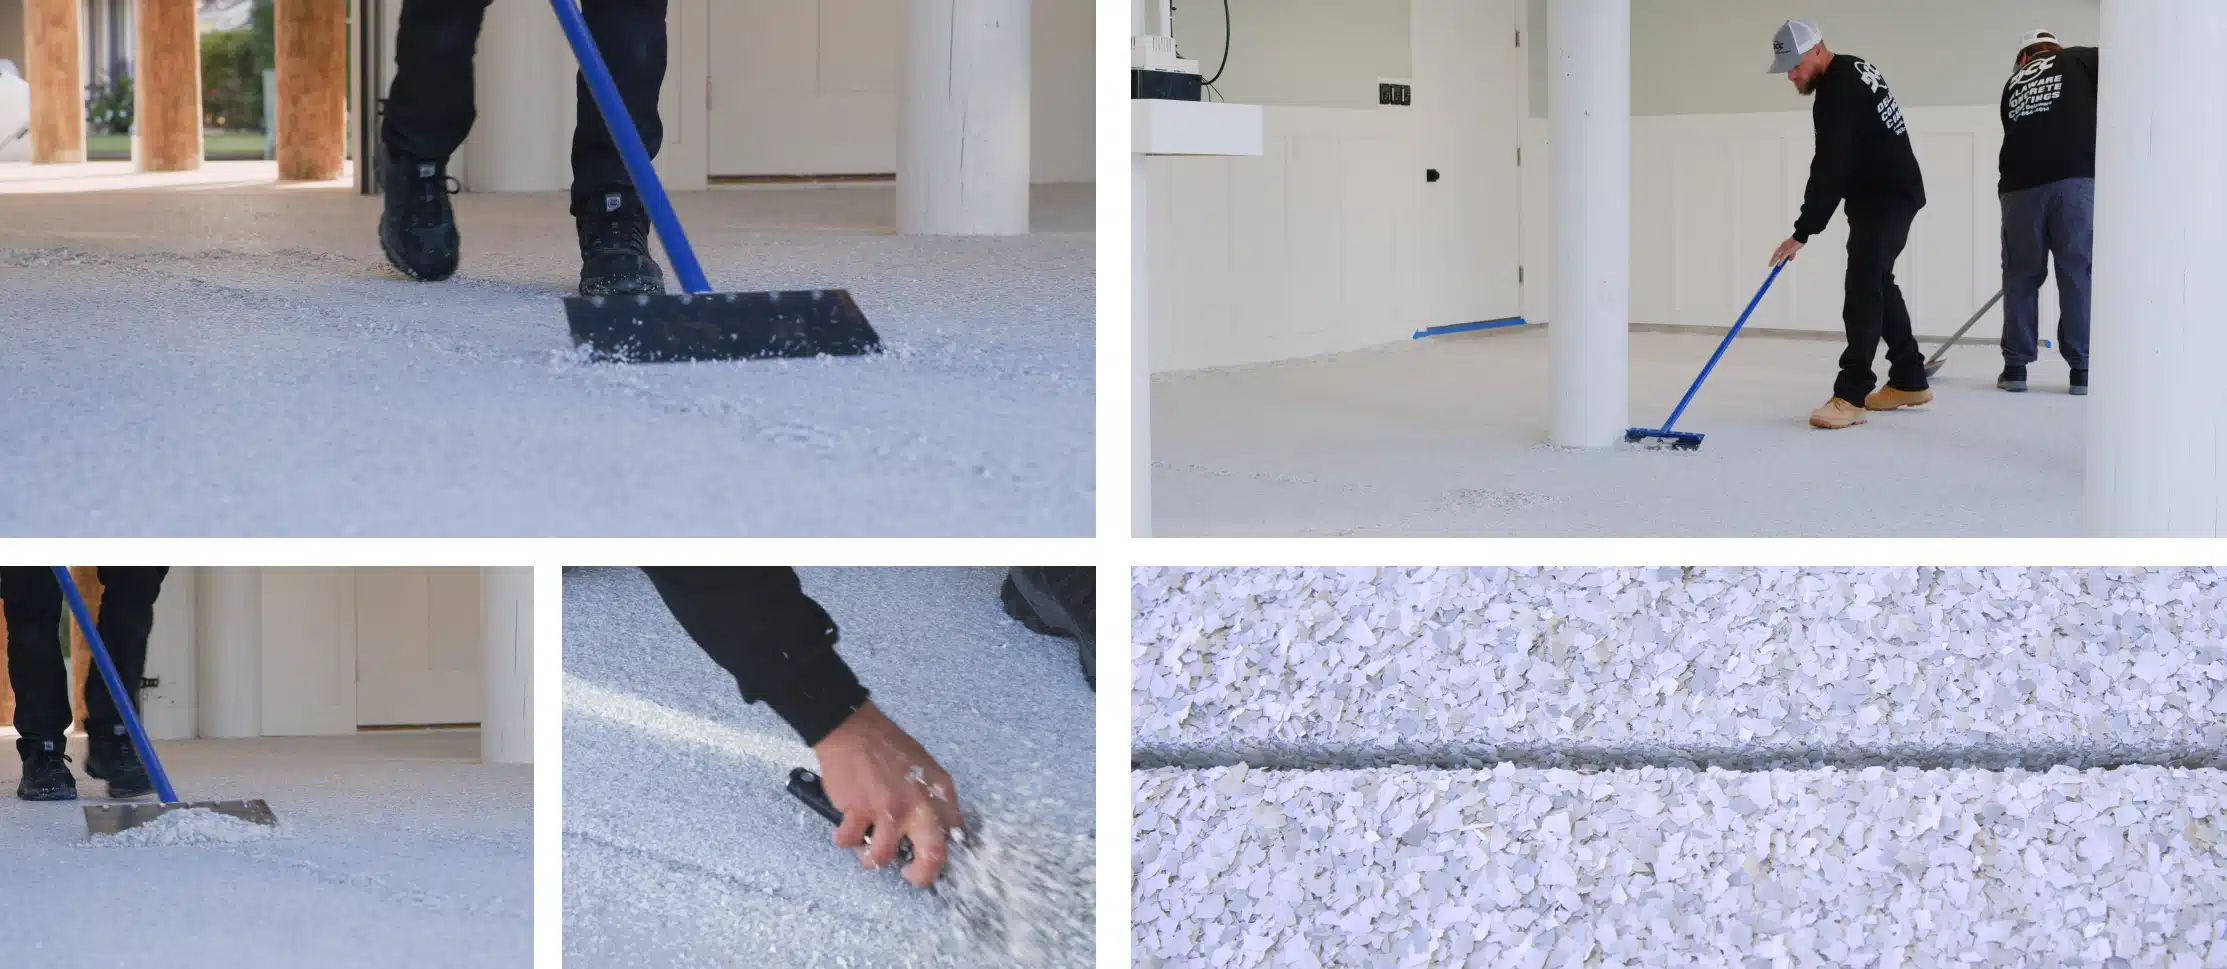
STEP 4 – SCRAPING & VACUUMING
After the chips have settled and the base coat has dried, the floor is scraped and vacuumed. This process removes any loose or vertical-standing chips, creating a uniform, smooth surface. Scraping ensures that the chips are fully integrated into the coating, enhancing the texture and making the floor safer to walk on. Vacuuming collects any excess material, preparing the surface for the final topcoat application.
STEP 5 – TOP COAT APPLICATION
The final step is the application of a clear topcoat, which seals in the decorative chips and provides a glossy or matte finish, depending on your preference. This topcoat is designed for durability, creating a chemical-resistant barrier that protects the floor from stains, abrasions, and UV damage. It also makes the floor easier to clean, maintaining its aesthetic appeal with minimal maintenance. The topcoat is applied evenly, ensuring a smooth, professional finish that will last for years.
This 5-step process by Delaware Concrete Coatings not only ensures a beautiful and durable floor coating but also reflects our commitment to quality and customer satisfaction.
FIND INSPIRATION
View Our Latest Projects